
I still remember my first digiscoping attempt. A snowy egret stood 30 feet away, perfectly lit. I held my phone to the eyepiece, snapped a burst, and got back a blurry grey smudge with a bright white halo. That afternoon taught me more than any manual. This digiscoping for beginners guide is the shortcut I didn't have — the real reasons phones fail on scopes, the adapter that actually works, and the field habits that separate sharp shots from fuzzy regrets.
Quick Field Guide
What Is Digiscoping (and Why Your First Try Fails)
Digiscoping means shooting photos or video through a spotting scope using a digital camera or phone. Simple concept. Brutal execution. The scope magnifies everything — including your hand shake, sensor noise, and the tiny misalignment between lens and eyepiece. Most beginners point the phone at the glass, see a bright circle, and assume it's working. It isn't. You need the phone's lens to sit at the exact eye relief distance the scope was designed for. That's usually 15–20mm from the eyepiece glass, not pressed against it.
Here's the non-consensus bit: expensive scopes often make beginner digiscoping harder. A $2,000 scope with a wide, flat field seems like a dream until you realize the phone lens interacts badly with that optical design, creating a dark ring or kidney-bean vignette. I've had cleaner first results from a mid-range 65mm scope than from a flagship 85mm. The sweet spot for learning is a scope with moderate eye relief and a simple fixed eyepiece — not a zoom.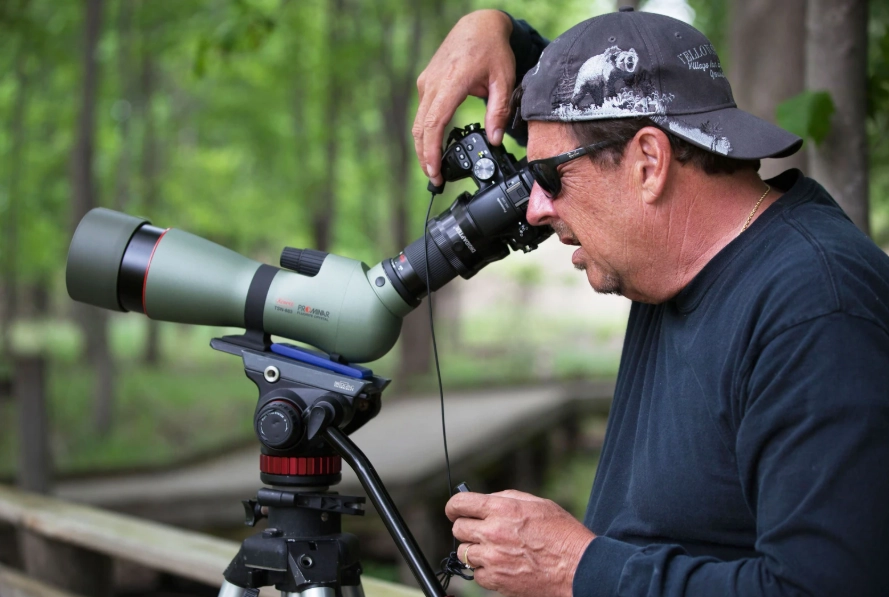
The Adapter Mistake That Ruins 90% of Beginner Shots
Everyone buys a universal phone adapter. The clamp-style ones that grip your phone and hover a ring over the eyepiece. I've tested nine of them. Seven slipped. Two scratched my eyepiece. The problem isn't your technique — it's the design. A clamp applies uneven pressure and never centers the phone lens perfectly. A 0.5mm offset at the phone lens becomes a massive focus error through 30x magnification.
Second mistake: leaving image stabilization on. Phone OIS fights the scope's optics. Turn it off. Use a solid tripod and a remote shutter or 2-second timer. My keeper rate went from 1 in 40 to 1 in 5 after locking everything down.
Step-by-Step Digiscoping Setup for Beginners
Here's the sequence I walk friends through. It takes about four minutes once you've done it twice.
- Mount the scope on a sturdy tripod. Extend the center column last. A $40 fluid-head tripod beats a $15 photo tripod every time.
- Focus the scope visually first. Get the bird razor-sharp through the eyepiece with your eye. Don't skip this.
- Attach your phone with the bayonet adapter. Lock it down. Wiggle test — if the phone moves independently of the scope, start over.
- Open your camera app and zoom to 1x. Not 2x. Not 0.5x. The main lens aligns best. Use tap-to-focus on the bird's eye.
- Turn off flash, HDR, and live photos. Reduce shutter lag. Use a 2-second timer.
- Fine-focus using the scope's focus wheel. Watch the phone screen, not the eyepiece. Small nudges.
One detail that took me a full season to notice: the scope's focus wheel has backlash. Turn it past sharp, then come back. That removes the slack and gives you a crisper final image.
Budget Gear That Works (and What to Skip)
You don't need pro gear. You need gear that doesn't fight you. Here's what I've seen work in the field, with real prices from my local shop and online retailers this season.
| Gear Item | Good Beginner Pick | Price Range (USD) | Skip This |
|---|---|---|---|
| Spotting scope | 65mm angled scope with fixed 30x eyepiece (e.g., Celestron Regal M2 65) | $350–$450 | 80mm+ scopes with 20–60x zooms |
| Phone adapter | Bayonet-style adapter matched to your eyepiece (e.g., Phone Skope or Ollin) | $60–$90 | Universal clamp adapters under $25 |
| Tripod | Aluminum fluid-head tripod with quick-release plate | $70–$100 | Ultra-light travel tripods |
| Shutter release | Bluetooth remote or wired shutter | $12–$20 | Voice control (unreliable outdoors) |
Notice I didn't list a camera. Your phone is fine for learning. The bottleneck is alignment and stability, not sensor size. Upgrade the phone later if you catch the bug.
Field Habits That Fix Blurry Photos
Sharp digiscoping is 80% habits, 20% gear. Here's what actually moved the needle for me.
Shoot from a seated position when possible. I bring a lightweight folding stool. Standing and leaning into the scope transfers every heartbeat to the image. Sitting drops my blur rate by half.
Turn off the scope's zoom if you have one. Zoom eyepieces are convenient for viewing but terrible for beginners. The exit pupil changes as you zoom, and the phone lens alignment shifts. Lock in at one magnification and learn that view.
Use the histogram, not the screen brightness. Bright overcast days make the phone screen look darker than the actual image. I've underexposed hundreds of shots because the screen looked "fine." The histogram doesn't lie.
Clean the eyepiece and phone lens before every session. A single fingerprint on the eyepiece creates a soft glow across the entire frame. I keep a microfiber cloth in my jacket pocket. Non-negotiable.
When You Should Put the Phone Down
Digiscoping for beginners has a dark side: it steals your attention from the bird. My first season, I spent more time fumbling with adapters than actually watching behavior. I missed a peregrine stoop because I was resetting the phone clamp. That's a bad trade.
My rule now: if the bird is close enough to enjoy through the eyepiece, watch first. Photograph second. If it's a lifer, watch it until it moves naturally. Then shoot. The photo will be better because your setup is calm, and you'll actually remember the encounter. A slightly softer image of a bird you truly observed beats a sharp image of a bird you ignored.
Real Questions from My Inbox
Digiscoping is a craft of small corrections. Get the adapter right. Sit down. Watch the bird before you shoot. Those three habits took me from blurry frustration to images I actually print and hang. You'll get there faster than I did — you have this guide, and I had a snowy egret that deserved better.
Field notes and gear prices verified through hands-on testing and current retailer listings.
Reader Comments